How to Build a Content Roadmap with BloomDraft
Why Most Content Roadmaps Fail Before They Start
You have a list of 50 keywords. Your competitor analysis is done. You know you need consistent publishing. But between "keywords in a CSV" and "organized editorial calendar," there's a gap where most content strategies die. The problem isn't ideas — it's the operational friction of turning research into structure.
A functional content roadmap connects three things: what people search for, what topics naturally cluster together, and when you'll actually publish. Miss any one, and you're either chasing random keywords, confusing your audience with scattered topics, or staring at an aspirational calendar you'll never hit.
This guide walks through building that system inside BloomDraft, from raw keyword lists to scheduled publishing dates.
Prerequisites
Before you start:
- A BloomDraft account (free tier works for initial planning)
- 10-20 seed keywords related to your core topic
- Optional: product description if you're writing for a specific tool or service
- A rough sense of publishing frequency (weekly, bi-weekly, etc.)
Step 1: Create Your First Project
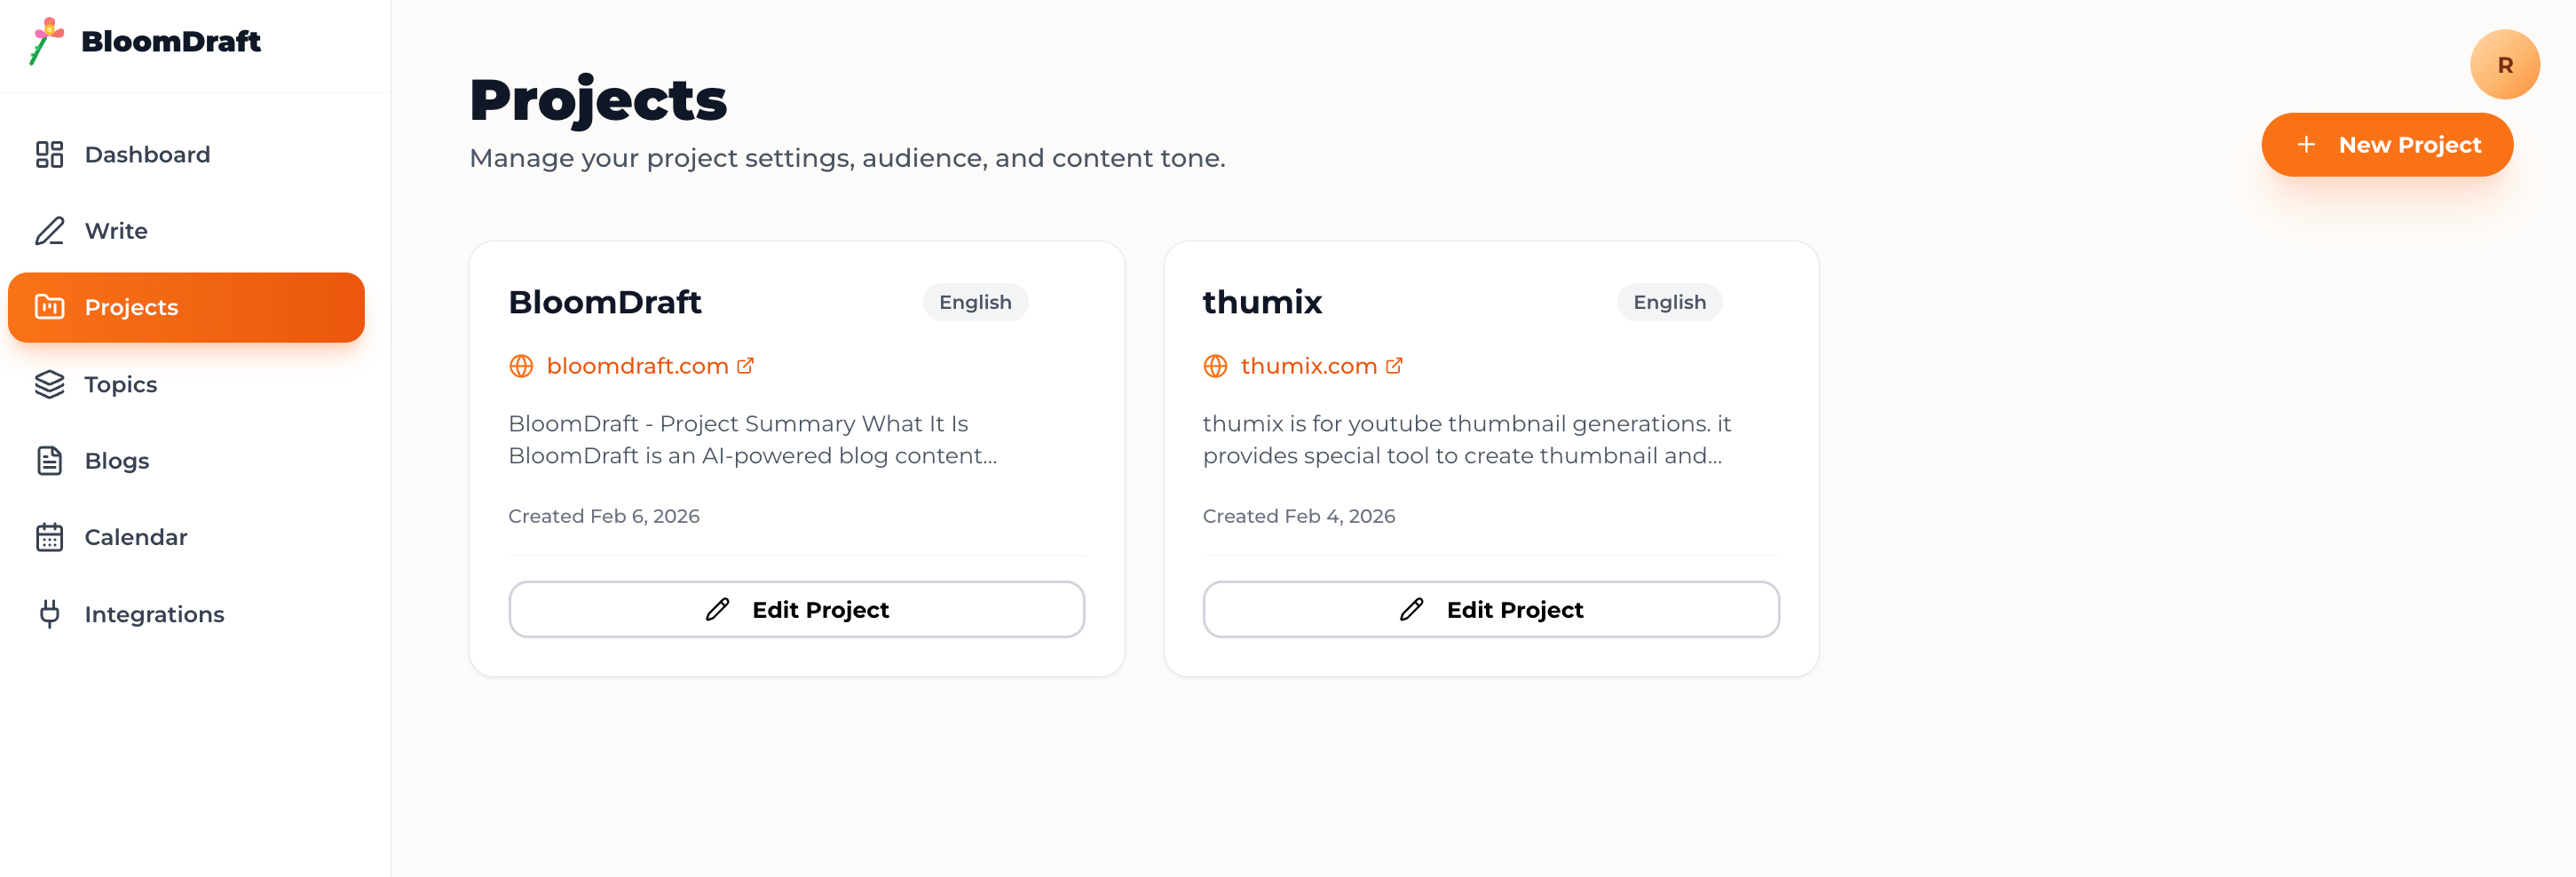
Projects in BloomDraft act as containers for related content. If you're building content for a SaaS product, a project bundles everything about that product — its context, voice, and feature image style.
Set up the project:
- Navigate to Projects and click "New Project"
- Enter your project name and website URL
- Add your product description — this becomes AI context for every piece of content generated
- Select your preferred feature image style (Notion minimal works well for most business content)
- Choose your language
The product description matters more than you'd think. It's not marketing copy — it's operational context. "Project management tool for remote teams" tells the AI nothing useful. "Asynchronous task management with built-in screen recording and async video updates" gives it something to work with.
Step 2: Generate Your First Topic Cluster
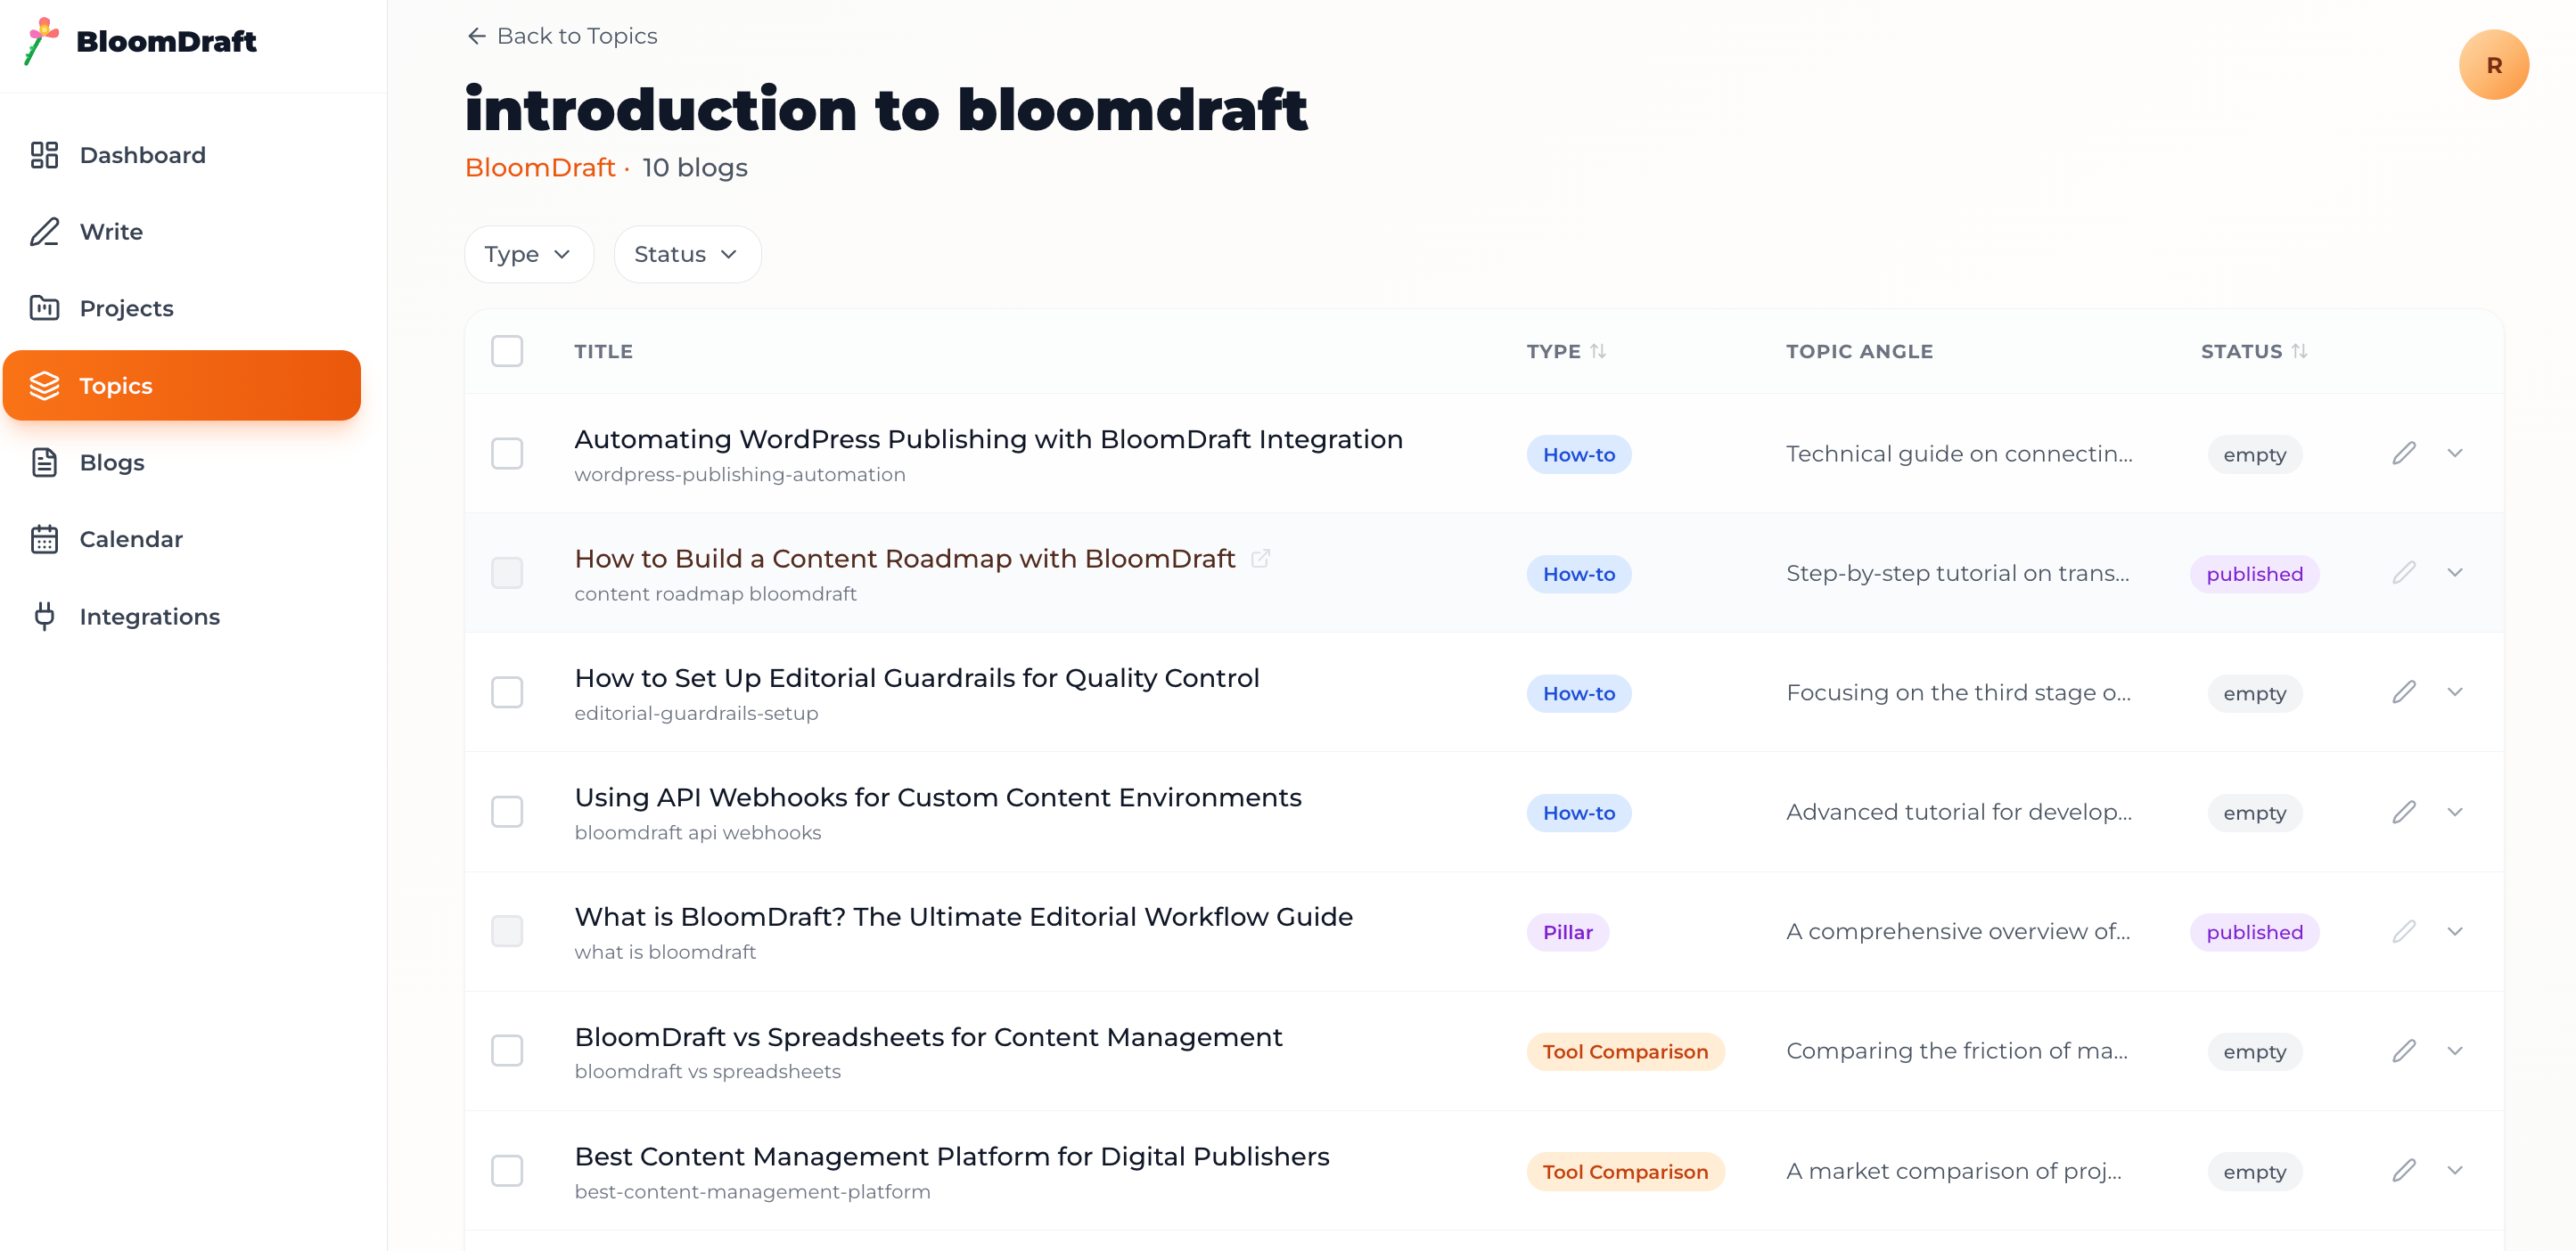
This is where keyword organization tool functionality separates platforms. Instead of manually grouping keywords into themes, you're letting AI identify natural clusters based on search intent and semantic relationships.
Create a cluster:
- Open "Topics" and click "New Cluster"
- Enter 1-3 seed keywords (e.g., "content calendar," "editorial planning," "blog scheduling")
- Paste your product description if you didn't add it at the project level
- Click "Generate Ideas"
BloomDraft returns 10-15 blog ideas structured around those seeds. Each idea includes:
- Suggested title and URL slug
- Article type (Pillar, How-to, Tool Comparison, Use Case)
- Search intent classification
- Primary and secondary keywords
You're not just getting titles — you're getting the structural DNA of each piece.
Step 3: Evaluate and Select Content
Not every generated idea deserves to exist. This is the filtering step most people skip, then wonder why their content performs inconsistently.
Look for:
- Search intent alignment — Does this match what your audience actually needs to know at this stage?
- Cluster coherence — Do these pieces reference and build on each other, or are they isolated islands?
- Keyword distribution — Are you covering head terms, mid-tail, and long-tail in a logical progression?
Select 5-8 pieces per cluster to start. You can always generate more later, but launching with a focused set keeps execution realistic.
Step 4: Map Content to Your Publishing Calendar
Planning topic clusters means nothing if they never ship. Here's where editorial calendar setup becomes concrete.
Sequencing logic:
- Week 1: Pillar content that defines the core concept
- Weeks 2-3: How-to articles that address specific use cases
- Week 4: Tool comparison or use case study that shows application
This rhythm works because it mirrors how people actually learn. Define the territory, show them how to navigate it, then prove it works.
In BloomDraft, you can generate all selected posts at once or stagger generation to match your review capacity. If you're a solo founder reviewing content yourself, generate 2-3 pieces per week. If you have an editor, batch-generate the full cluster.
Step 5: Generate and Review Content
Click "Generate Selected" to kick off the AI content pipeline. BloomDraft runs through:
- Title and slug refinement
- Outline creation with H2/H3 structure
- SEO metadata generation
- Full markdown content
- Quality scoring (0-100) with automatic rewrites if needed
- Optional feature image generation
- Internal linking suggestions
You'll see real-time progress for each post. Generation takes 3-5 minutes per article.
Review priorities:
- Does the intro frame a real problem, or is it generic throat-clearing?
- Are examples specific, or placeholder abstractions?
- Do internal links connect to other pieces in your cluster?
The markdown editor has split-screen preview, so you can edit and see formatting simultaneously. Auto-save runs every 30 seconds — if your browser crashes, you'll recover your draft on reload.
Step 6: Connect Your Publishing Destination
Content strategy mapping breaks down if publishing is a manual export/import nightmare. Direct CMS integration means "scheduled" actually happens.
WordPress setup:
- Install Application Passwords plugin (or use WordPress 5.6+ native support)
- Generate an application password in your WordPress user profile
- In BloomDraft, go to Settings → Integrations → WordPress
- Enter your site URL and application password
- Test the connection
Ghost setup:
- In Ghost admin, go to Settings → Integrations → Custom Integration
- Create a new integration and copy the Admin API key
- In BloomDraft, enter your Ghost site URL and API key
- Test the connection
Once connected, you can publish individual posts immediately or schedule them. Bulk publish sends multiple posts at once — useful when you're loading an entire cluster at launch.
Step 7: Schedule Your Roadmap
With content generated and CMS connected, set your publishing dates. BloomDraft's scheduling system lets you assign specific dates and times to each post.
Scheduling strategy:
- Publish pillar content first — it's the anchor for internal links
- Space supporting articles 3-5 days apart
- Schedule comparison/use case content after foundational pieces are live
If you're publishing to WordPress, scheduled posts appear as "scheduled" in WordPress, not "published." This means you can review them in your CMS before they go live.
Troubleshooting Common Issues
Generated content feels generic: Your product description is too vague. Add specific features, use cases, or technical details. "Email tool" → "Email client with offline-first architecture and built-in encryption."
Topic cluster ideas don't connect: Your seed keywords are too broad or unrelated. Try narrower seeds: instead of "marketing, SEO, content," use "on-page SEO, technical SEO, SEO audits."
Publishing fails silently: Check your API credentials. For WordPress, regenerate your application password. For Ghost, verify your API key hasn't expired and your site URL includes the protocol (https://).
Quality scores consistently low: The AI is flagging structural issues — usually lack of specificity or repetitive phrasing. Regenerate with more detailed product context, or edit manually to add concrete examples.
What You've Built
You now have:
- Keyword lists organized into semantic clusters
- 5-8 pieces of content per cluster, each with defined search intent
- A publishing calendar with specific dates
- Direct CMS integration that executes the schedule automatically
This isn't a static document. As you publish and see what performs, you'll spot gaps — search terms you missed, questions readers ask in comments, adjacent topics worth exploring. Create new clusters, generate more content, and schedule it. The system scales with your ambition.
The difference between a content roadmap that works and one that collects dust is operational momentum. When generating, reviewing, and publishing are connected in one workflow, you actually ship. When they're scattered across tools, you spend more time managing the system than executing it.